In this article:
Are you a baseball enthusiast looking to enhance your game by swinging a homemade wooden bat? Crafting your baseball bat is a rewarding and satisfying experience that can greatly improve your performance on the field.
In this comprehensive guide, we will walk you through the step-by-step process of creating a high-quality wooden baseball bat that perfectly suits your preferences and playing style.
From selecting the right wood to shaping and finishing techniques, we’ll cover everything you need to know to create a comfortable bat that provides optimal performance and stands the test of time.
Whether you’re a seasoned woodworker or a beginner eager to dive into the world of bat-making, this article will equip you with the knowledge and skills to make a wooden baseball bat that rivals those used by professionals.
Get ready to unleash your inner craftsman and elevate your game to new heights with a personalized, handcrafted wooden baseball bat. Let’s jump right in!
Understanding the Wood
When crafting the perfect wooden baseball bat, understanding the wood you choose is the key to unlocking a masterpiece. Each type of wood brings unique characteristics to the plate, affecting the bat’s performance and durability.
So, let’s step into the world of timber and discover which wood is a home run for your bat-making adventure.
Types of Wood Suitable for Bats: Finding Your Lumber Legend
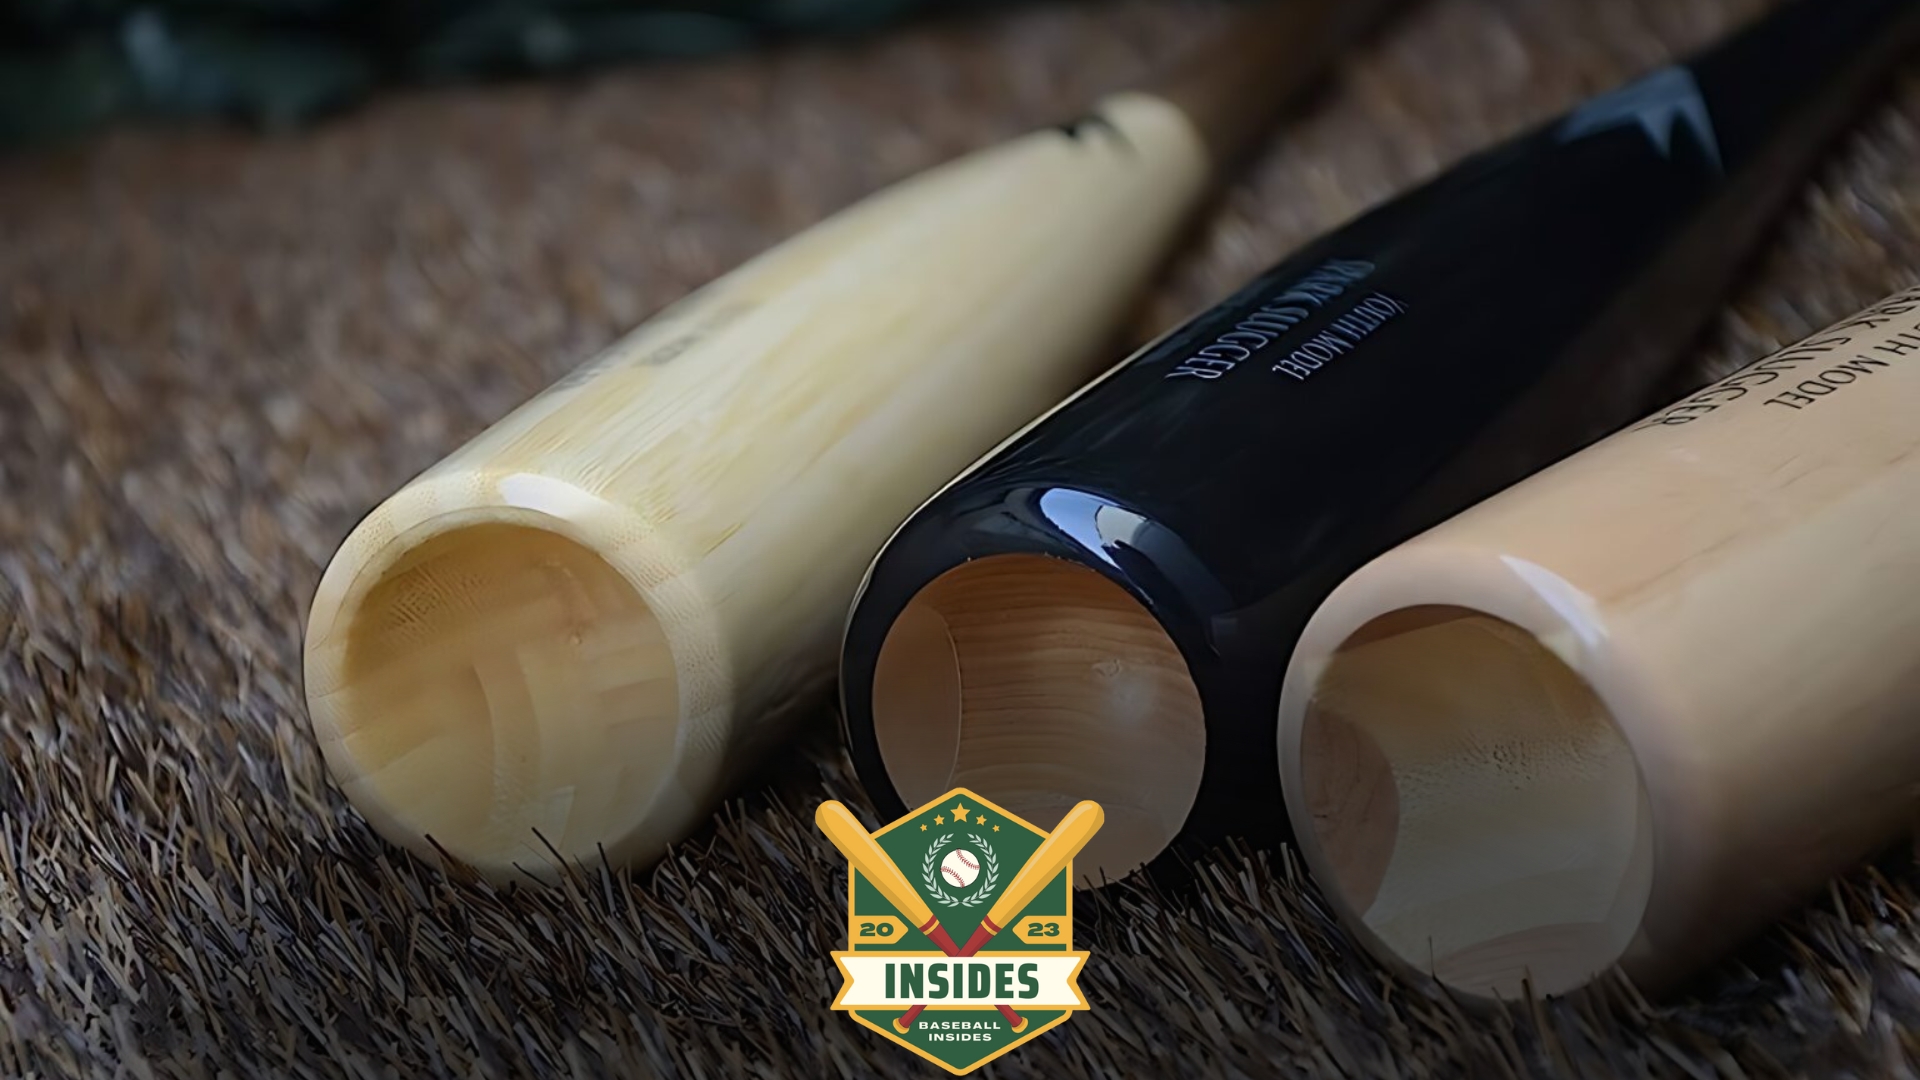
- Maple: The heavyweight contender in the realm of wooden baseball bats. Maple boasts exceptional hardness and durability, making it a popular choice among power hitters craving solid contact and increased ball velocity.
- Ash: The traditional favorite, beloved by many legendary sluggers of the past. Ash bats are renowned for their lightweight nature, providing players with an optimal balance of speed and power.
- Birch: The rising star in the world of wooden bats. Birch combines the best of both worlds, blending maple’s hardness with ash’s flexibility. It offers a smooth and solid feel while maintaining durability.
Factors to Consider When Choosing Wood: Separating the Timber from the Lumber
- Durability: The lifespan of your bat depends on the wood’s ability to withstand the impact of fastballs and curveballs. Consider the wood’s hardness, resistance to cracking, and overall durability to ensure your bat can handle the heat of the game.
- Density: The density of the wood influences the bat’s weight and swing speed. A denser wood provides more power but sacrifices some speed, while lighter wood prioritizes quickness. Find the balance that suits your style and preferences.
- Grain Structure: The grain pattern affects the bat’s strength and performance. Straight, tight grains contribute to better durability, while irregular grains can lead to potential weak points. Look for a consistent and even grain structure to maximize the bat’s resilience.
Understanding the characteristics of different woods and considering these vital factors will help you make an informed decision when choosing the perfect wood for your wooden baseball bat.
Remember, the wood you select will shape the future of your swings, so choose wisely!
While exploring the meticulous craft of making a wooden baseball bat, it’s interesting to delve into the quirks and traditions of the players themselves, such as “Why Does Baseball Players Chew Gum?”
This habit, deeply ingrained in the culture of baseball, offers a fascinating glimpse into the routines and superstitions that players believe enhance their performance on the field.
Selecting the Perfect Billet
In the pursuit of crafting a wooden baseball bat that will leave opponents in awe, one crucial step stands out: selecting the perfect billet. Think of the billet as the raw gem that holds the potential to become a work of art.
So, let’s embark on a journey to unearth the ideal billet for your bat-making masterpiece.
What is a Billet?
A billet is a cylindrical piece of wood from which your baseball bat will take shape. It serves as the foundation, embodying the potential to become a bat that will launch home runs into the stratosphere.
But not all billets are created equal, and understanding what sets the extraordinary apart from the ordinary is essential.
Evaluating Billet Quality
When selecting the perfect billet, several factors come into play. Let’s explore the key elements to ensure you work with a billet worthy of your craftsmanship.
- Straightness: A straight billet is a fundamental requirement for crafting a high-quality bat. A billet with minimal bending or warping will provide a solid foundation for turning and shaping.
- Moisture Content: The moisture content of the billet is critical for a successful bat-making journey. Too wet wood may lead to cracks or warping during drying, while excessively dry wood can result in brittleness. Aim for a moisture content of around 8-12% for optimal results.
- Defects: Inspect the billet for visible defects such as knots, checks (cracks), or other imperfections. While minor defects can sometimes be worked around, it’s best to start with a billet that’s as defect-free as possible to ensure a superior final product.
By meticulously evaluating your billet’s straightness, moisture content, and overall quality, you lay the foundation for a bat that will perform at its best and stand the test of time.
Preparing the Tools and Workspace
Before delving into the art of bat making, ensuring you have the right tools and a workspace that sets the stage for your creative brilliance is crucial.
Imagine a symphony conductor preparing their orchestra—the tools and workspace are their baton and stage, allowing them to create a harmonious masterpiece.
So, let’s gather our tools and set the scene for your bat-making symphony.
Essential Tools for Bat Making
- Lathe: The heartbeat of your bat-making journey. A wood lathe allows you to turn and shape the billet into a finely crafted baseball bat. Look for a lathe with adjustable speed settings and sturdy construction to handle the demands of bat making.
- Turning Tools: A set of quality turning tools is your arsenal for shaping the bat. From gouges and skew chisels to scrapers and parting tools, each tool serves a specific purpose in carving the perfect profile and handle.
- Measuring Tools: Precision is key when crafting a bat. Equip yourself with measuring tools such as a caliper, ruler, and marking gauge to ensure accurate dimensions and consistent results.
- Safety Gear: Protect yourself while unleashing your craftsmanship. Safety goggles, a dust mask, and ear protection are essential to shield against flying wood chips, dust, and excessive noise.
Setting Up a Suitable Workspace: The Theater of Bat-Making
- Sturdy Workbench: A solid and stable workbench forms the foundation of your bat-making domain. Ensure it can support the weight of your lathe and withstand the forces applied during turning.
- Sufficient Lighting: Illuminate your workspace with ample lighting to see the finest details of your work. A well-lit area minimizes mistakes and enhances the precision of your craftsmanship.
- Ventilation System: Woodworking can generate dust and fumes. Proper ventilation, such as a fan or dust collector, helps maintain a clean and healthy workspace.
Safety Precautions to Consider: Guarding Your Craft and Well-being
- Read and Follow Instructions: Familiarize yourself with the user manuals and safety guidelines for all tools and equipment. Follow proper operating procedures to ensure your safety and the longevity of your tools.
- Secure Workpieces: Always secure the billet firmly in the lathe’s chuck or spindle before turning. A loose workpiece can lead to accidents and jeopardize your craftsmanship.
- Take Breaks and Stay Alert: Woodworking can be physically demanding. Take regular breaks to avoid fatigue, and remain attentive to your surroundings to prevent accidents.
As you gather your tools, arrange your workspace, and prioritize safety, you’re ready to step onto the stage of bat-making.
The curtain is about to rise on a performance where your mastery and imagination will shine.
In addition to understanding the craftsmanship behind a wooden baseball bat, appreciating the iconic symbols of the sport, like the baseball cap, adds another layer of depth. Learning “How to Draw a Baseball Cap?” can give fans a new way to express their love for the game, whether they’re sketching their favorite team’s logo or designing a cap that represents their personal style.
Measuring and Marking
In the world of bat making, measurements and markings are the compasses that guide your artistic vision.
Like an architect meticulously mapping out the blueprint of a grand structure, precise measurements and well-placed marks lay the foundation for a remarkable wooden baseball bat.
So, let’s dive into measurement and marking, where precision meets vision.
Determining Bat Length and Weight
- Bat Length: Consider your height, stance, and preference when determining the ideal bat length. A longer bat provides reach and leverage, while a shorter bat offers enhanced control and maneuverability. Find the sweet spot that suits your swing.
- Bat Weight: The weight of your bat affects swing speed and power. Heavier bats pack a punch, but lighter bats offer faster swing speeds. Strike a balance that aligns with your strength and playing style.
Marking the Billet for Turning
- Handle and Barrel: Measure and mark the desired handle and barrel lengths on the billet, considering the predetermined bat length. Ensure the marks are clear and easily visible for reference during the turning process.
- Tapering: Tapering refers to the gradual reduction in diameter from the barrel to the handle. Marking the tapering points on the billet ensures a smooth transition and optimal grip feel. Use a marking gauge or pencil to draw precise lines.
Pro Tip
Don’t Forget the Knob! The knob, located at the end of the handle, adds comfort and stability to your grip. Consider its size and shape while marking the billet, allowing for seamless integration into your design.
By carefully measuring the bat’s length and weight and marking the billet with precision, you set the stage for a bat that feels like an extension of yourself.
These initial steps pave the way for turning your wooden canvas into a work of art.
Turning the Bat
Welcome to the heart of the bat-making process—turning. Like a skilled dancer twirling on a stage, the lathe becomes your partner, allowing you to shape the raw timber into a magnificent wooden baseball bat.
The bat’s profile emerges with each precise movement, embodying the perfect blend of form and function.
So, let’s step up to the lathe and embark on the captivating journey of turning the bat.
Introduction to Wood-Turning
Woodturning is an age-old art form where a spinning piece of timber meets the skillful touch of the craftsman.
It’s a dance of craftsmanship and finesse as you transform the billet into a bat that will soon find its rhythm on the baseball diamond.
Using a Lathe for Bat Turning
- Securing the Billet: Mount the billet securely between the lathe’s headstock and tailstock. Ensure it’s centered and aligned properly to avoid imbalances during turning.
- Turning Techniques: Utilize various turning techniques to shape the bat to perfection. From roughing cuts to smoothing passes, each movement of the turning tools brings you closer to the desired profile.
Shaping the Bat Profile
- Handle Dimensions: Carve the handle to your desired thickness, diameter, and shape. Consider your grip preferences and the overall comfort and control you seek.
- Barrel Shape: Gradually shape the barrel, curving it to create the optimal hitting surface. Balance the desired bat weight and size while maintaining the structural integrity of the wood.
- Tapering: Skillfully taper the bat from the barrel to the handle, ensuring a seamless transition and a natural feel in the hands. Gradual and precise tapering enhances the bat’s performance and aesthetics.
As you work the lathe, the bat takes shape before your eyes, revealing the harmony between craftsmanship and the raw beauty of timber.
With each pass of the turning tools, you breathe life into your creation, turning a simple piece of wood into a true work of art.
Smoothing and Sanding
In bat making, the finishing touches separate a good bat from a great one.
Like a sculptor meticulously smoothing out the imperfections of a masterpiece, the process of smoothing and sanding brings out the true beauty of your wooden baseball bat.
So, let’s dive into the art of refinement and polishing, where your bat transforms into a work of art.
Preparing the Surface
- Removing Tool Marks: Use rough grit sandpaper or a sanding tool to remove any visible tool marks left from the turning process. Work methodically along the bat’s surface, paying attention to the handle, barrel, and transition areas.
- Filling Defects: If you encounter small defects or imperfections, such as minor cracks or gaps, fill them with wood filler or epoxy resin. Allow the filler to dry thoroughly before proceeding.
Smoothing the Bat: Unleashing the Silky Touch
- Progressive Grits: Start with medium-grit sandpaper and work to finer grits. This progressive sanding process helps achieve a smooth and even surface, gradually removing roughness and refining the bat’s contours.
- Sanding Block Technique: Wrap the sandpaper around a sanding block to maintain consistent pressure and avoid uneven surfaces. Use long, smooth strokes, following the grain of the wood, to ensure a uniform result.
Finishing Touches: Bringing Out the Luster
- Choosing a Finish: Select a suitable finish for your bat, such as polyurethane, varnish, or wood stain. Consider factors like durability, aesthetics, and grip feel when choosing.
- Applying the Finish: Follow the manufacturer’s instructions for applying the chosen finish. Use a brush or cloth to apply an even coat, allowing proper drying time between coats. Sand lightly between coats for a silky-smooth finish.
As you smooth and sand your bat to perfection, its surface transforms into a visual and tactile delight.
The hours of dedicated craftsmanship and attention to detail culminate in a stunning bat that feels exceptional in a player’s hands.
Transitioning from the artistry of bat making to the practical considerations of equipment usage, the question of “Can You Use a Baseball Bat for Softball?” arises.
This inquiry not only highlights the differences between these two beloved sports but also emphasizes the importance of using the right tools for the right game, much like the precision required in crafting the perfect wooden baseball bat.
Applying a Finish
Congratulations! You’ve reached the stage where your bat’s transformation will culminate in a glorious finish.
Like a master painter adding the final strokes to a masterpiece, applying a finish brings out the true brilliance of your wooden baseball bat.
So, let’s apply a finish where your bat’s beauty peaks.
Choosing the Right Finish
- Consider the Purpose: Determine the primary purpose of your bat—whether it’s for game use, display, or both. Different finishes offer various durability, protection, and aesthetic appeal levels, so select one that aligns with your goals.
- Types of Finishes: Explore different finishes, such as polyurethane, varnish, oil, or wax. Each has unique properties, ranging from high gloss to a more natural, matte appearance. Choose a finish that enhances the wood’s natural beauty while providing the desired level of protection.
Preparing for Application
- Surface Preparation: Ensure the bat’s surface is clean, dry, and dust-free. Lightly sand the bat using fine-grit sandpaper to create a smooth and receptive surface for the finish.
- Masking and Protection: If necessary, use masking tape or protective tape to cover any areas you wish to keep free from the finish, such as the handle or knob. This will ensure clean lines and prevent accidental application.
Applying the Finish
- Brushing Technique: Use a high-quality brush suitable for the chosen finish. Apply the finish in even, smooth strokes, following the grain of the wood. Take care to avoid drips, runs, or uneven coverage.
- Multiple Coats: Apply multiple thin coats of finish, allowing each coat to dry fully before applying the next. This builds up a protective layer while enhancing the depth and luster of the bat’s appearance. Sand lightly between coats for a flawless finish.
As you apply the finish, your bat undergoes a stunning transformation.
The richness of the wood grain is accentuated, and the finish adds a layer of protection, ensuring your bat’s longevity and performance on the field.
Adding Grip: Enhancing Comfort and Control
You’re in the home stretch of creating your wooden baseball bat masterpiece, but there’s one vital element left to consider—adding grip.
Like a tailor customizing a suit for the perfect fit, adding grip to your bat enhances comfort, control, and confidence during those crucial moments on the field.
So, let’s explore the art of adding grip, where your bat becomes an extension of your hand.
Grip Options
- Bat Grip Tape: Bat grip tape offers a practical and cost-effective solution. It comes in various colors, textures, and thicknesses, allowing you to choose the grip that suits your preferences and playing style.
- Rubberized Grips: Rubberized grips provide excellent shock absorption, reducing the impact felt in your hands during powerful swings. They offer enhanced comfort and a secure hold, even in wet conditions.
- Tacky Grips: Tacky grips, often made of synthetic materials, offer a sticky surface with exceptional grip and control. They are particularly beneficial for players who prefer a firm hold on the bat.
Applying the Grip
- Prepare the Bat Handle: Ensure the bat handle is clean and free from dirt or residue. If needed, lightly sand the handle for improved adhesion.
- Starting Point: Begin applying the grip from the bottom of the handle, overlapping each wrap slightly for a seamless finish. Secure the grip tightly but avoid overstretching, which may affect its longevity.
- Smooth and Even Wrapping: As you progress up the handle, maintain consistent tension and alignment, creating smooth and even wraps. Avoid wrinkles or bubbles that could affect the grip’s performance.
With the grip in place, your bat is transformed into a weapon of precision and confidence. The added traction and comfort allow you to unleash your full potential on the field, knowing the bat perfectly suits your grip.
Branding and Personalization
Congratulations on creating your very own wooden baseball bat! It’s time to add that final touch of personality and distinction—branding and personalization.
Just as a signature distinguishes a renowned artist’s masterpiece, branding your bat leaves an indelible mark representing your craftsmanship and passion.
Let’s dive into branding and personalization, where your bat truly reflects your identity.
Choosing Your Branding Style
- Engraving: Engraving offers a timeless and elegant way to personalize your bat. You can engrave your name, initials, team logo, or other design onto the bat’s surface. Select a reputable engraving service, or consider investing in a wood-burning kit to do it yourself.
- Decals and Stickers: Decals and stickers provide a versatile and customizable option for adding branding and personalization. Choose from a variety of designs and team logos, or create your own custom graphics to make your bat truly unique.
Placement and Design
- Barrel: The barrel of the bat is a popular location for branding, as it offers ample surface area for displaying your chosen design. Consider the size and intricacy of your branding elements to ensure they fit harmoniously on the barrel.
- Handle or Knob: Personalizing the handle or knob is another option. Engraving your name or initials on the handle adds a personal touch that’s always close at hand during every swing.
With branding and personalization, your bat becomes more than just a tool—an extension of your identity and a symbol of your dedication to the craft.
Whether it’s the subtle elegance of an engraved signature or the bold statement of a custom decal, your bat now bears the mark of distinction.
As we conclude this journey, remember that making a wooden baseball bat is not just about crafting a functional tool; it’s a labor of love, passion, and creativity.
Cherish the process, enjoy the artistry, and embrace the satisfaction of holding in your hands a bat that is uniquely yours.
Curing and Final Inspection
You’re in the home stretch of your wooden bat-making journey, but before you step onto the field, there are two essential steps left—curing and final inspection.
These final stages ensure that your bat is fully prepared and meets the highest standards of craftsmanship.
So, let’s delve into the art of curing and final inspection, where your wooden bat achieves its final state of perfection.
Curing the Wood
Curing is a process that allows the wood to stabilize and adjust to its environment, minimizing the risk of warping or cracking. Place your bat in a cool, dry area with good air circulation and let it cure for at least several weeks. This period may vary depending on the type of wood used.
Regularly check the moisture content of the bat using a moisture meter. The ideal moisture level for a wooden baseball bat is typically around 8% to 12%. Ensure the bat reaches this optimal range before the final inspection.
Final Inspection
Carefully inspect the entire bat, paying attention to details such as the surface’s shape, dimensions, and smoothness. Look for imperfections, such as cracks, knots, or uneven surfaces.
Weigh your bat to ensure it falls within the desired range for your playing style and preferences. Additionally, check the bat’s balance by gripping it near the barrel and observing if it feels evenly distributed or tends to tip forward or backward.
Tap the bat gently with a solid object and listen for a crisp, resonant sound. A well-crafted bat will produce a satisfying and distinct “ping” or “crack” that signifies its quality.
Once you have completed the curing process and conducted a thorough final inspection, you can take pride in your wooden baseball bat.
It has undergone a remarkable journey—from raw timber to a finely crafted tool ready to unleash its potential on the baseball field.
Remember, each bat you create is a testament to your skill, dedication, and love for the art of bat making. Take a moment to appreciate the craftsmanship that went into creating your masterpiece.
Conclusion
In conclusion, crafting your very own wooden baseball bat can be an incredibly rewarding and fulfilling endeavor.
From selecting the perfect piece of wood to shaping and refining it with precision, the process combines both artistry and athleticism.
As you swing that handmade bat for the first time, feeling the satisfying crack as it connects with the ball, you’ll know you’ve created something truly special.
So grab your tools, unleash your creativity, and embark on this timeless journey of woodworking and baseball. Whether you’re a player or a passionate fan, making your wooden baseball bat will undoubtedly add a unique touch to your love for the game.
Step up to the plate and create a masterpiece that will make heads turn and sparks fly on the baseball field. Play ball, and let your craftsmanship shine!
Frequently Asked Questions
How Do I Make a Wooden Baseball Bat?
To make a wooden baseball bat, select a high-quality piece of wood such as maple, ash, or birch. Cut the wood to the desired length and shape it using a lathe or a handheld rasp and sandpaper.
Ensure that the bat is balanced and has the appropriate weight distribution. Smooth any rough edges and apply a wood finish or sealant for durability.
Finally, attach a grip to the handle using adhesive or friction tape. Consult a woodworking expert or reference guides for more detailed instructions and safety precautions throughout the process.
Can a Wood-Turning Lathe Make a Bat?
Yes, a wood-turning lathe can be used to make a wooden baseball bat. A lathe is a versatile tool for precision shaping and turning wood. Securing the wood blank on the lathe can be rotated while a cutting tool is used to shape it into the desired bat profile.
The lathe’s spinning motion enables consistent and symmetrical shaping, resulting in a well-balanced bat.
However, it’s important to note that using a lathe requires skill and experience, so seeking guidance or instruction from an expert or reference materials is recommended before attempting to make a bat using this tool.
What Materials Are Used in Making Baseball Bats?
Baseball bats are typically made from three main types of wood: maple, ash, and birch. Maple bats are known for their dense and hard composition, providing durability and a solid feel upon contact with the ball.
Ash bats offer lighter weight and flexibility, making them popular for players seeking increased bat speed.
Birch bats combine the qualities of both maple and ash, providing a balanced option.
Additionally, some bats may be made from composite materials, such as carbon fiber, which offer enhanced performance characteristics like increased power and durability.
However, wooden bats remain the traditional and widely used choice in baseball.